How to make a Strip Quilt
If you know me very well, you know that I enjoy quilting, but I have to keep it easy! If the pattern is too complicated, I get sidetracked or overwhelmed. That’s why I love the Stip Quilt pattern. The Strip Quilt is a great pattern for beginners but can be adapted to have many different looks. If you are interested in trying a new quilt pattern, take a look at how easy this is to create an amazing quilt with beginner skill level!
This post includes affiliate links.
Strip Quilts
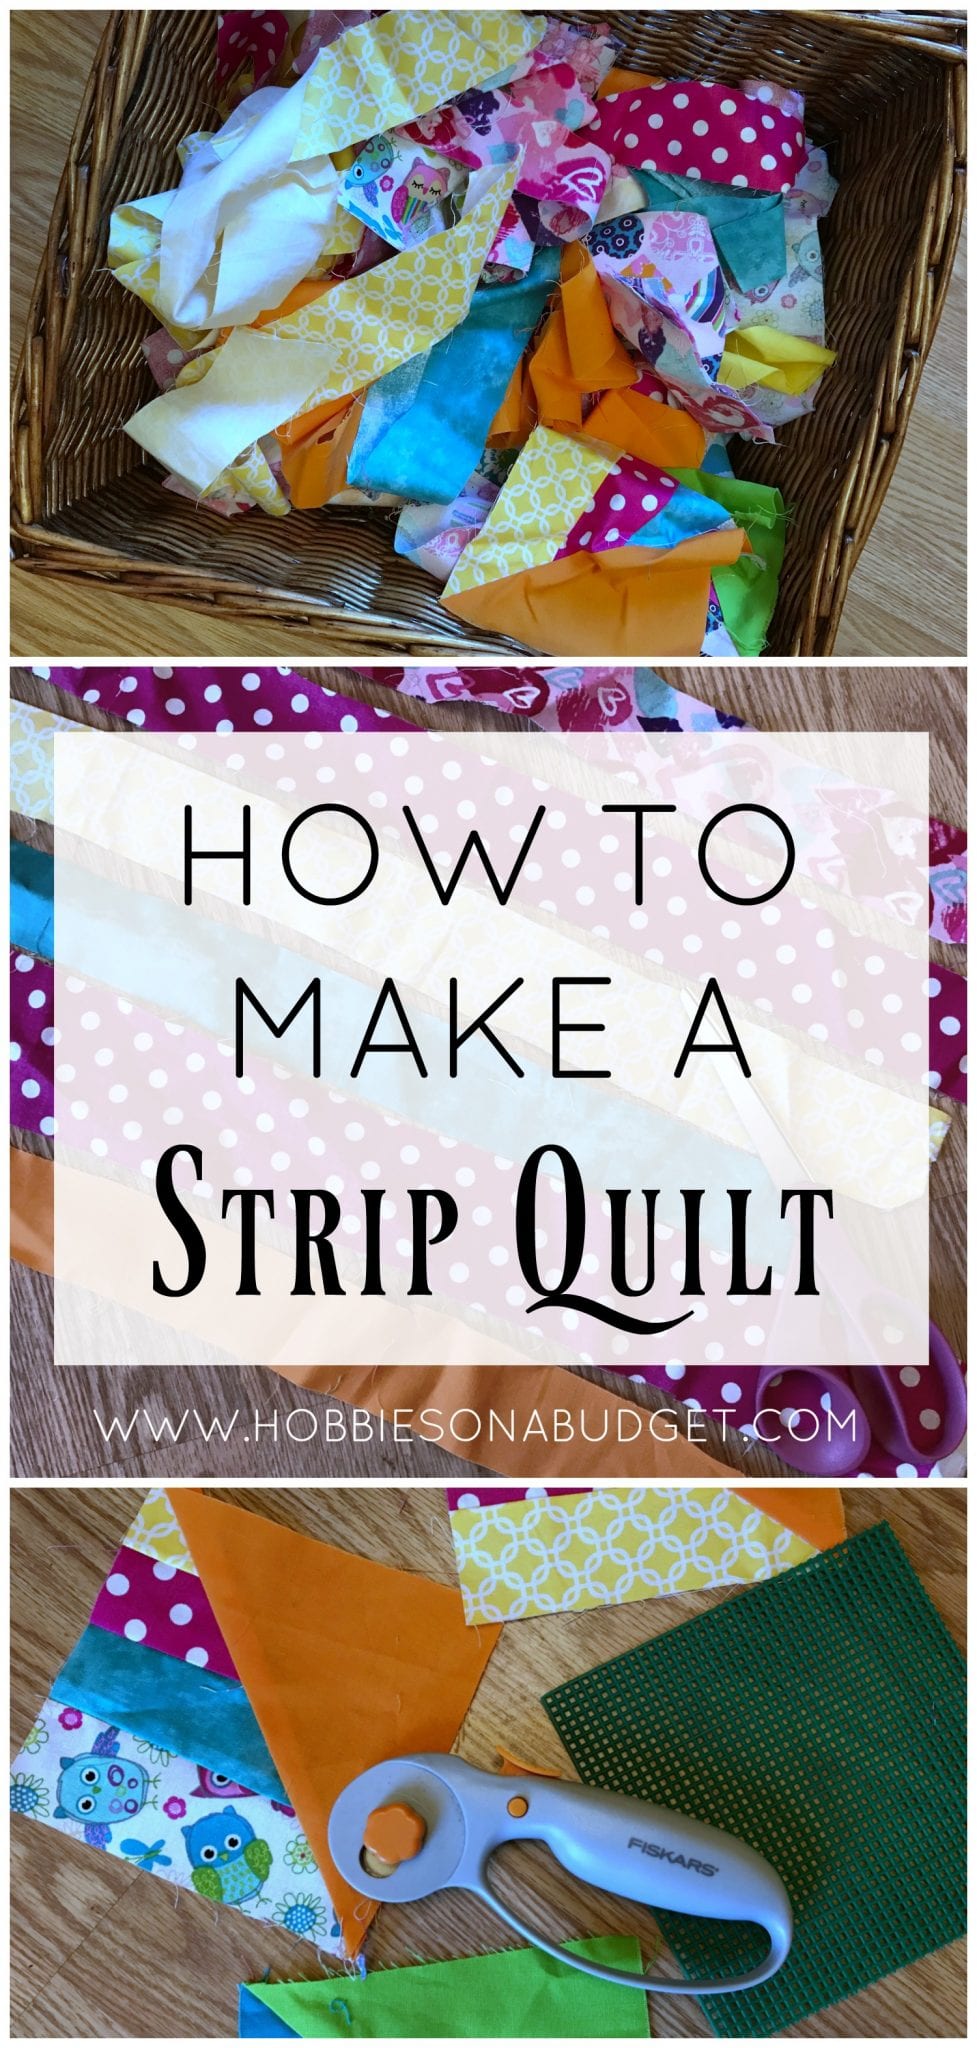
Strip Quilts are made of long strips of scrap fabric that are then trimmed into a block. The strips can be a fabric that you purchase on purpose for this quilt or you can use up narrow strips of scrap fabrics that aren’t big enough to use for any other pattern. You can sew these strips of fabric together until you cover a pattern in the shape of a diamond, square, triangle or any shape you choose!
Materials:
- a variety of fabric strips ( can be any width)
- square template for the blocks
- border fabric
- batting
- backing
Instructions
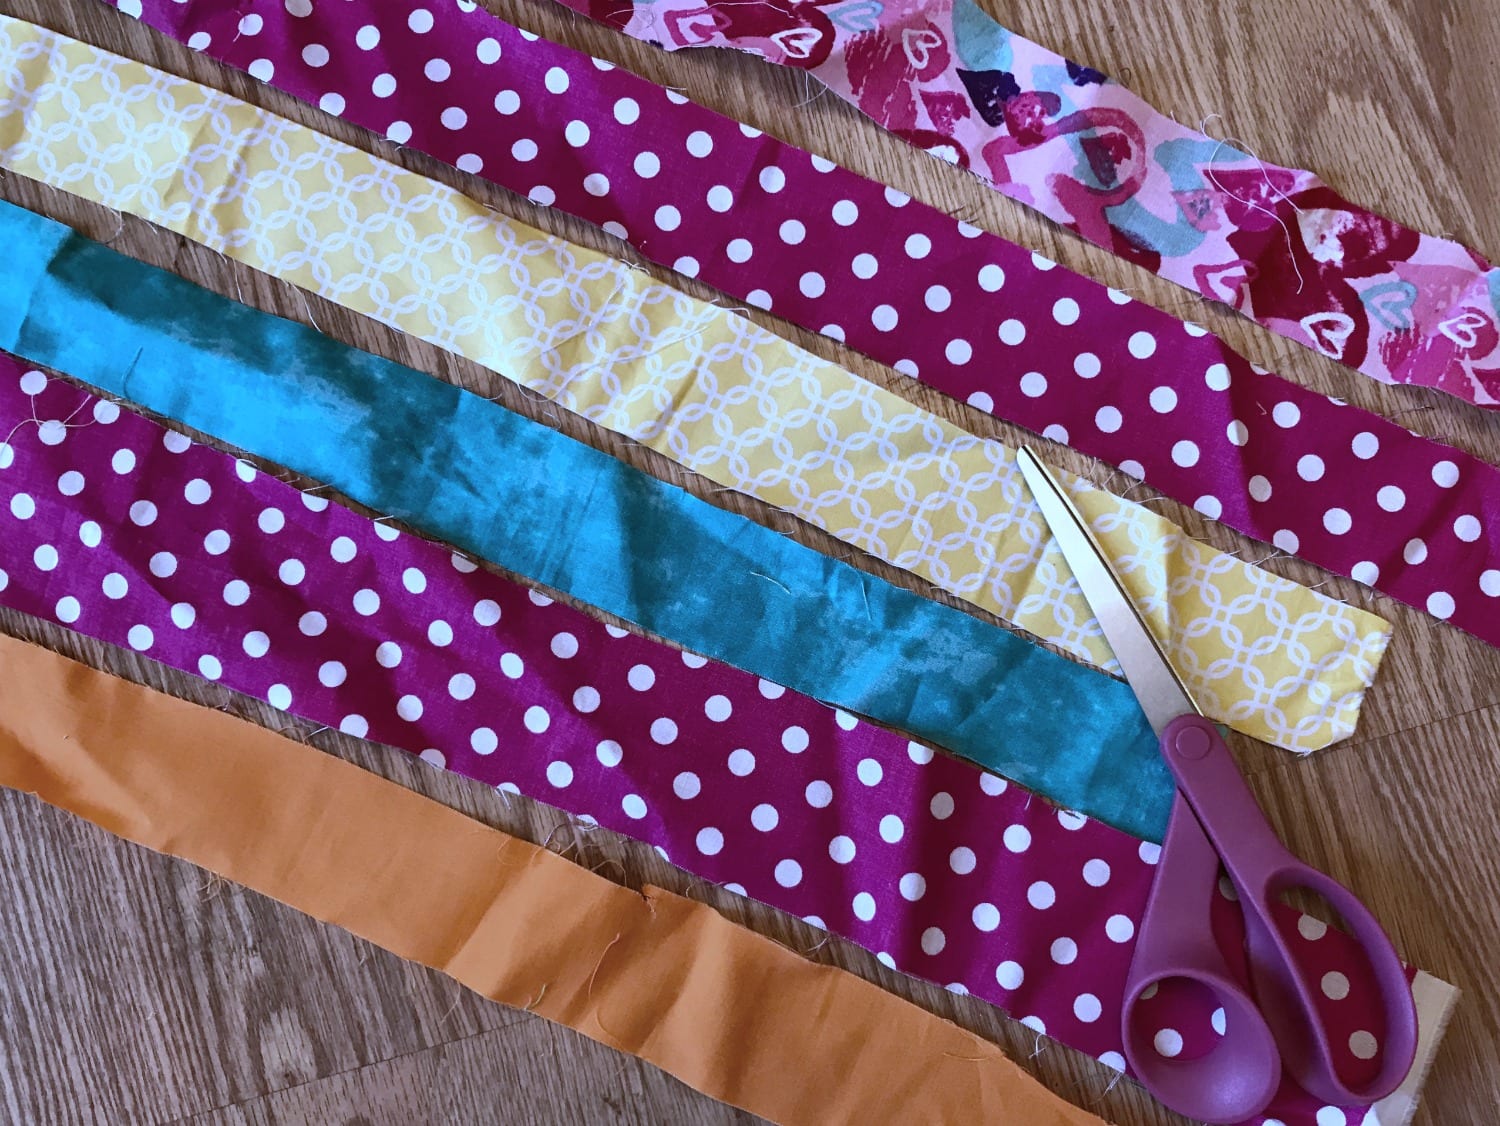
- Sew your strips together using a ¼ inch seam till you have enough strips to fit your template. They can have a particular pattern or just be a random mix of any patterns or colors.
- When you have a section large enough, you use your template and cut out a new block.
I started out using a piece of a cardboard box for my template, but soon found that plastic craft canvas works better. It’s easier to make a clean cut and you don’t accidentally trim it when you are cutting the blocks.
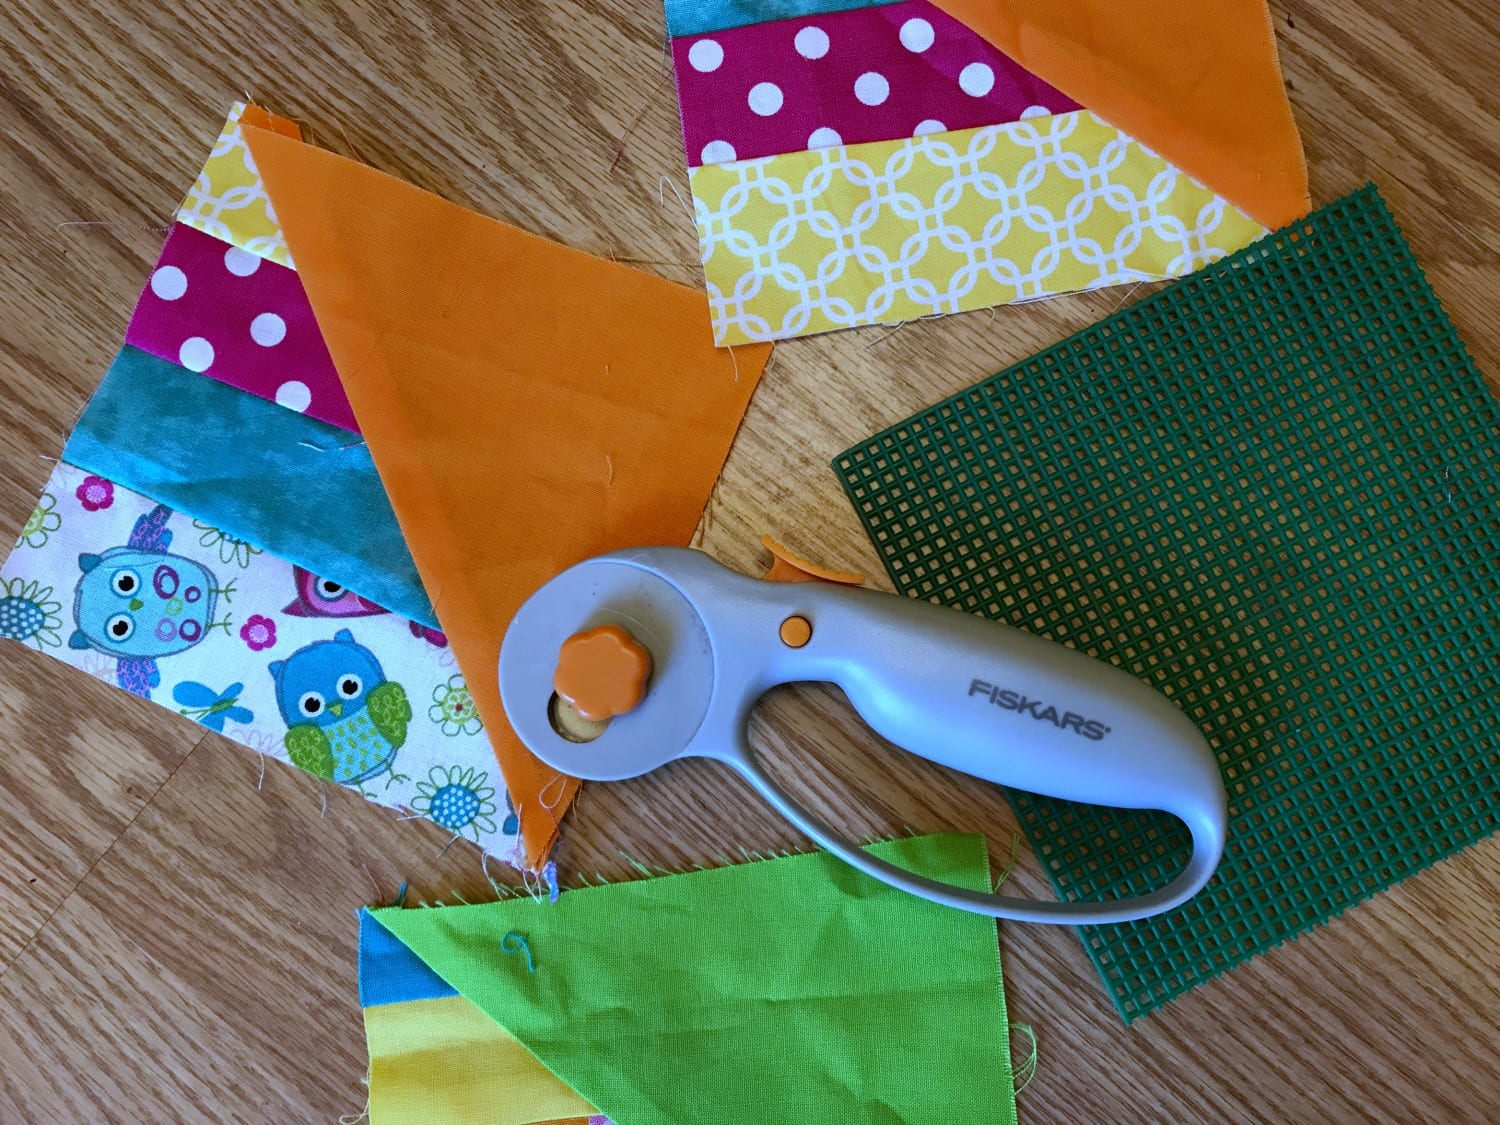
- Set your template on top of the fabric strips. Turn the template so it makes a diamond shape.
Tilt the template to add a unique look or use a half square to create a total different look opposite the strips.
- Cut around the template using your rotary cutter.
- Turn the cut-out shape back on its side. Once all of your blocks are cut out, measure and trim to make them all the same size.
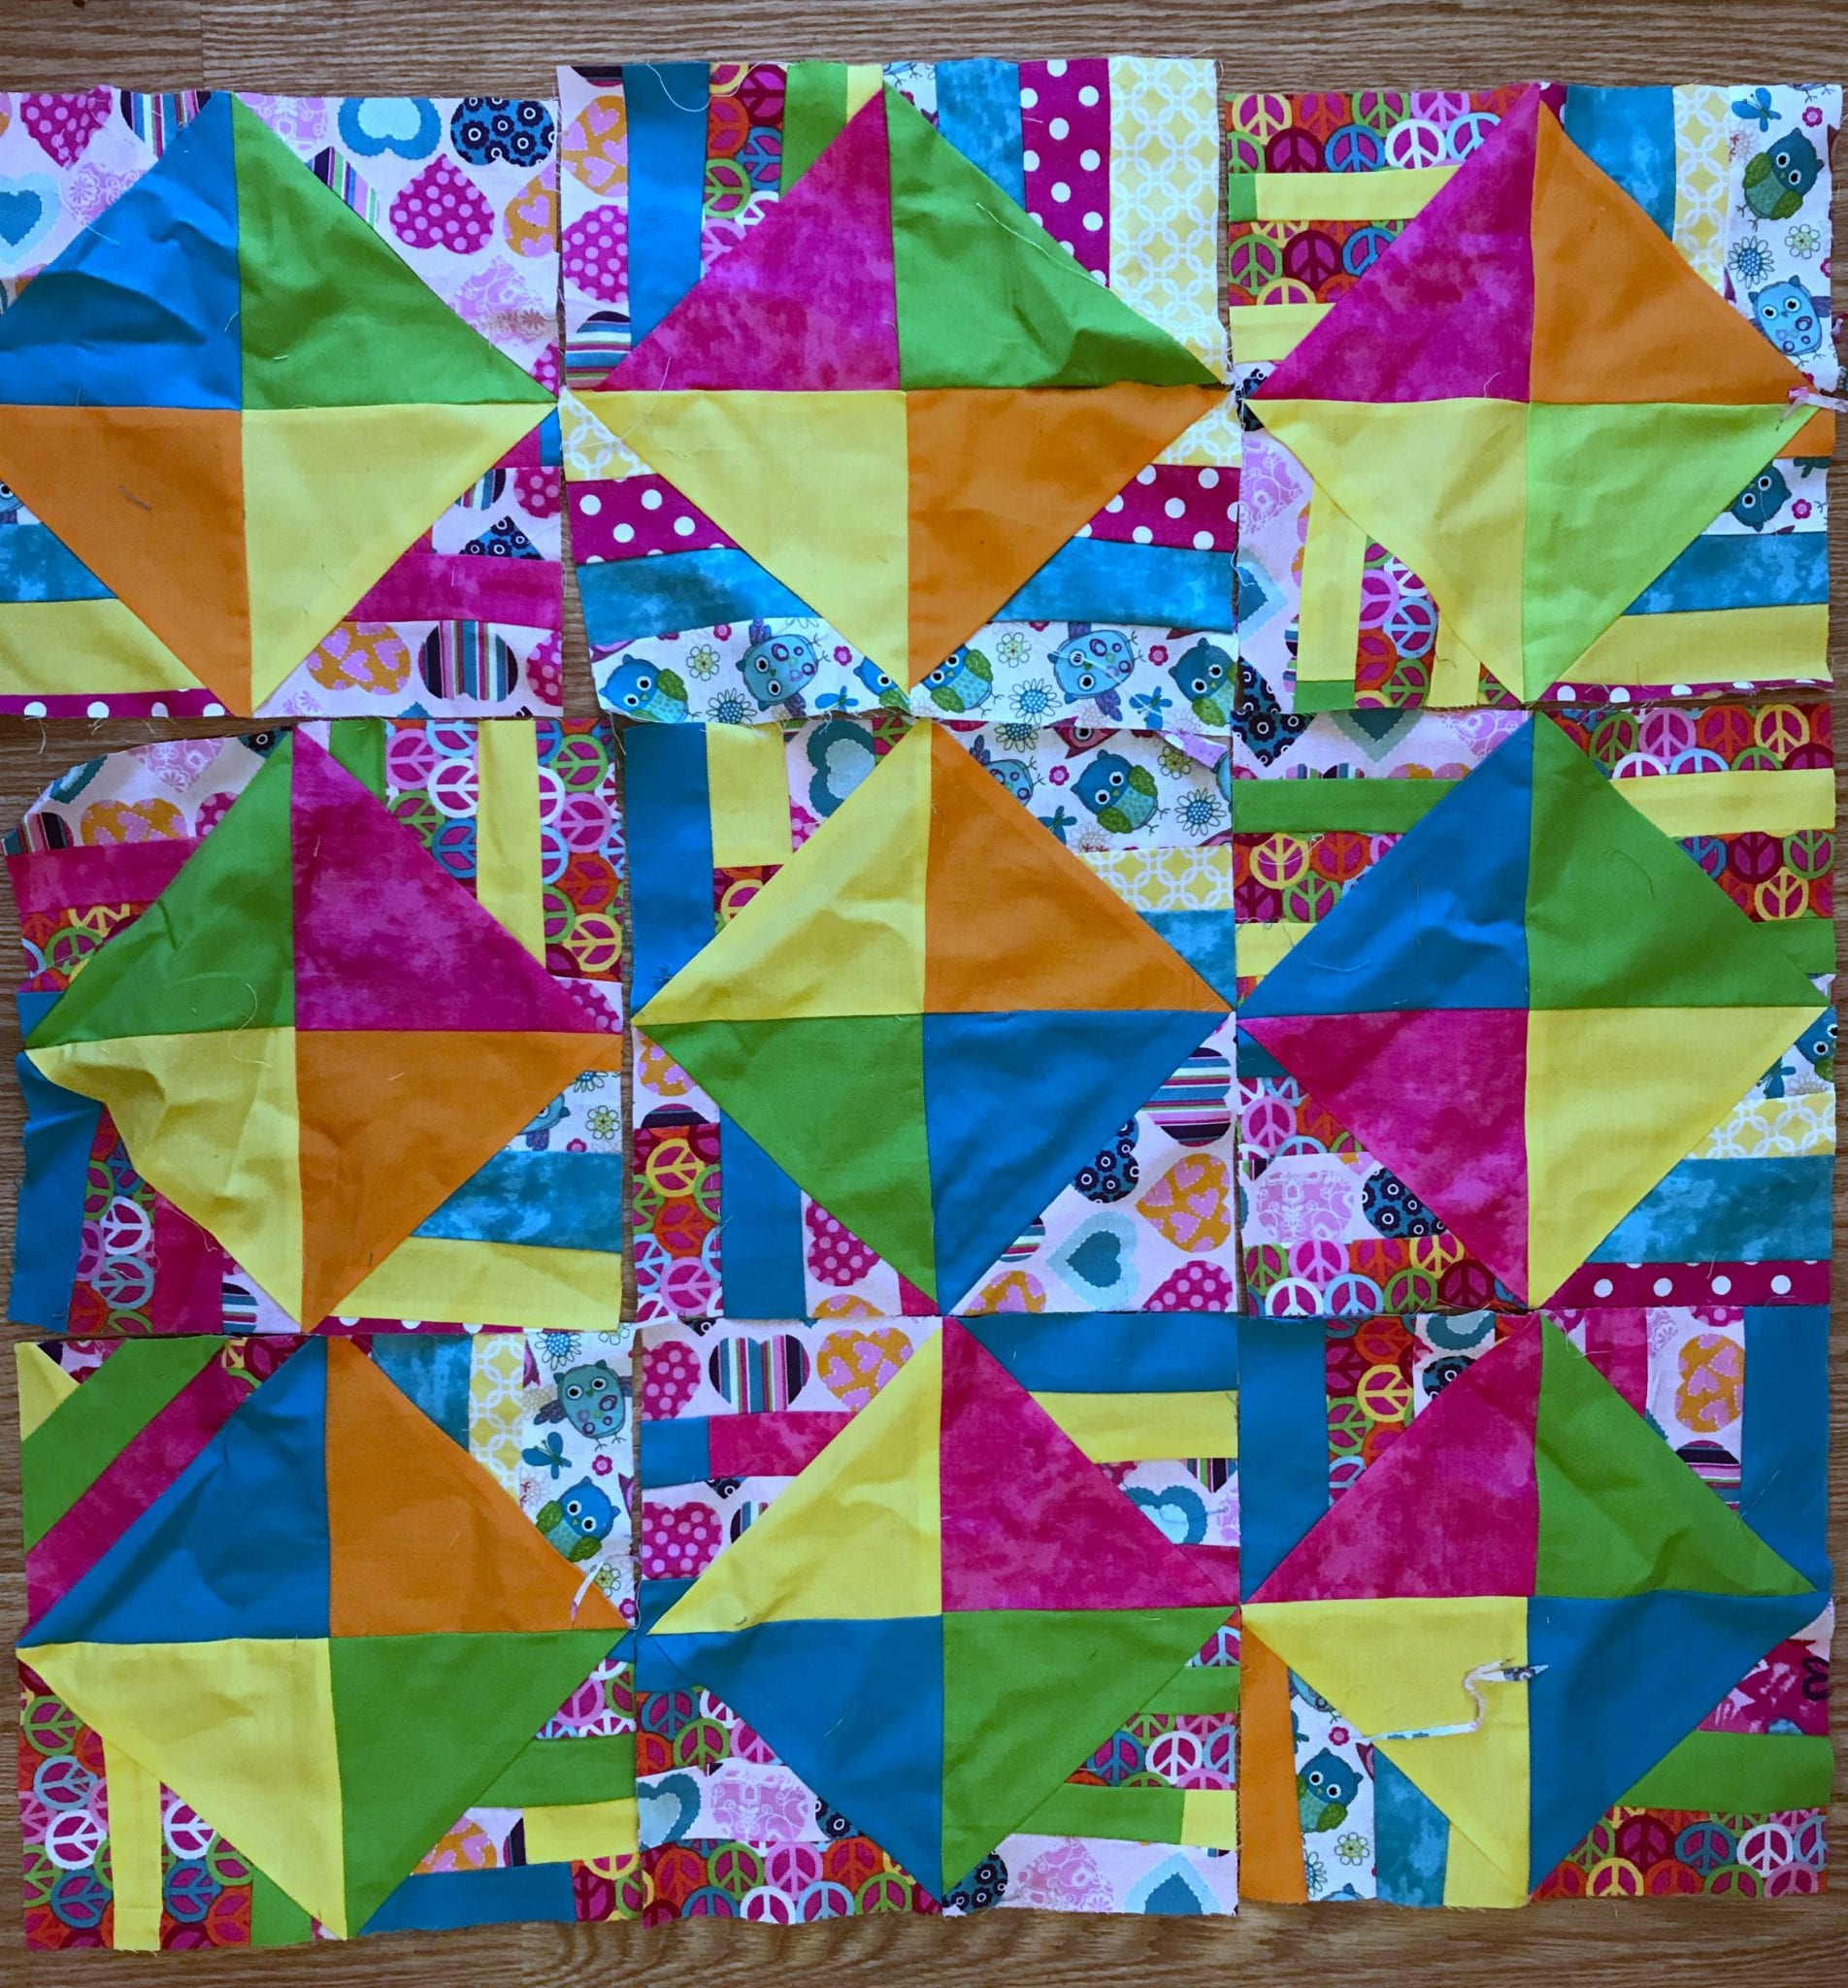
- Sew the blocks together to create your topper.
A few years ago I started this Strip Quilt and spent some time brainstorming the pattern with Grandma. I have to admit that deciding which way to connect each of the pieces is sometimes the most fun part!

Creative Tip: Place all of your strips in a basket, close your eyes and pull one out. Repeat this to form your block. It is so much fun to see what happens. Also, this makes a special keepsake quilt when you use baby clothes.
I haven’t made much progress on connecting the pieces but at least I have it back out so I can get motivated to work on this really fun quilt! Would you use a solid piece between each of the blocks? I’d love to hear your opinion!
Online Quilt Show
[table id=3 /]


Thanks everyone. I am so glad these post are inspiring ya’ll. Remember I have only been doing this for about 6 years. If I can do it anyone can!